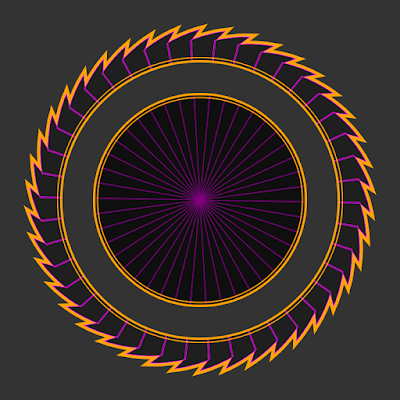
In this tutorial i will show you how to
create a sunburst in Inkscape version 0.92.
This effect also goes by the name of sunrays, radial rays or rising sun.
This effect also goes by the name of sunrays, radial rays or rising sun.
Older versions of Inkscape had a bug that required a workaround to get the correct effect, which is no longer a part of this updated tutorial (summer 2018).
So make sure you have the latest program version installed !
(You can click on all images or open them in a new tab, to see in full size.)
Im using the default Din-A-4 page size, but in landscape mode (you can change that in the 'Document Properties' (Shift + Ctrl + D).
So make sure you have the latest program version installed !
(You can click on all images or open them in a new tab, to see in full size.)
Im using the default Din-A-4 page size, but in landscape mode (you can change that in the 'Document Properties' (Shift + Ctrl + D).
Before we start, make sure the right
snapping modes are enabled.
Go to the 'Snap Bar' at the right side of your Inkscape window and turn the following options on.
Go to the 'Snap Bar' at the right side of your Inkscape window and turn the following options on.
We start by creating guides in the
middle of our canvas.
For that im creating a rectangle, which exactly fills the page.
Getting the correct size should be easy
because snapping to page border is enabled.
Hit the Space bar to select the
rectangle.
Add '/2' to the values in both entry
boxes for width and height (you only have to do it once if the little lock is active).
Inkscape does the math for you and you
will end with a quarter of your original rectangle.
Next go to 'Object' → 'Object to Guides'.
Now that the canvas is ready, we need
to create a triangle.
Draw a rectangle: Width 20px and
Height ~ 700px and convert it into a path (Shift + Ctrl + C).
1. select the bottom Segment between the Nodes by clicking on it with the Node Tool
(see how both nodes get highlighted blue)
2. delete Segment (the red line representing the Segment disappears)
3. join nodes
1. select the bottom Segment between the Nodes by clicking on it with the Node Tool
(see how both nodes get highlighted blue)
2. delete Segment (the red line representing the Segment disappears)
3. join nodes
 |
| (for the image i used a smaller triangle in grey so you can see the red path and to make the steps clearer) |
Select your triangle and put the bottom
tip on the crossing of both guides. The node should snap to the
guides.
With the triangle selected, click the
object a second time, so it enters rotation mode.
Grab the little cross in the middle and
drag it to the guides intersection.
It should snap, because 'snap an item's
rotation center' is enabled.
With the triangle still selected, go to
Edit → Clone → Create Tiled Clones.
(Make sure to reset the tiled clones
dialogue before you start typing in values.)
For the 'Shift Tab':
We want the triangle to rotate around
the guide intersection (where we placed the rotation center), thats
why we need to exclude the tile in the 'Shift' tab.
Make sure these boxes are ticked.
Make sure these boxes are ticked.
For the 'Rotation Tab':
Because our object is vertical, we have only 1 Row, but we want many Columns.
72 seems like a good value and its easy to calculate too, because 360 degrees (of a circle) divided by 72 (triangles) is 5 degrees.
If we now hit 'Create', the triangle is cloned in a circle !
Thats the basic sunburst effect.
Now, here's a nice little trick how to tweak your triangles into the perfect sunburst:
when you select the triangle on top, you can actually see in the status bar, its a clone and not a path.
But trust me, the path is still there: its under the clone.
Thats why you can delete the top clone.
If you accidentally delete the original, it will unlink all your clones and convert them into paths.
(this behaviour can be changed in the Preferences → Behaviour → Clones).
If you accidentally delete the original, it will unlink all your clones and convert them into paths.
(this behaviour can be changed in the Preferences → Behaviour → Clones).
With the original triangle selected, switch to the Node Tool, so the nodes appear.
Select the two top nodes, press Shift and hit the 'Greater than' key (its the key next to Shift on my keyboard).
This will make the nodes expand in opposite directions and every clone will follow.Before this tutorial ends, i want you to show the beauty of tiled clones.
The radial clones we just created can be live edited into lots of effects other than just a hundred sunburst variations.
One example is the buzzsawblade from a previous post on this blog.
All i did was clone a simple shape into a circle and then play around with node sculpting (Node Tool) and Boolean Operations (like Union and Difference) to add and subtract stuff, until i got something i liked.
A second example is a different buzzsaw-esque design that was inspired by a famous record album cover. (the orange stroke comes from a duplicate on a different layer)


No comments:
Post a Comment